Friday, September 28, 2018

Rustic Watering Can Arrangements

Rustic Watering Can Arrangements Bring the action of gardening to the table by organizing white blossoms in weathered watering cans (look at thrift stores and flea markets.) Tulips are a great choice, as they are affordable and evoke a casual-yet-elegant feeling.


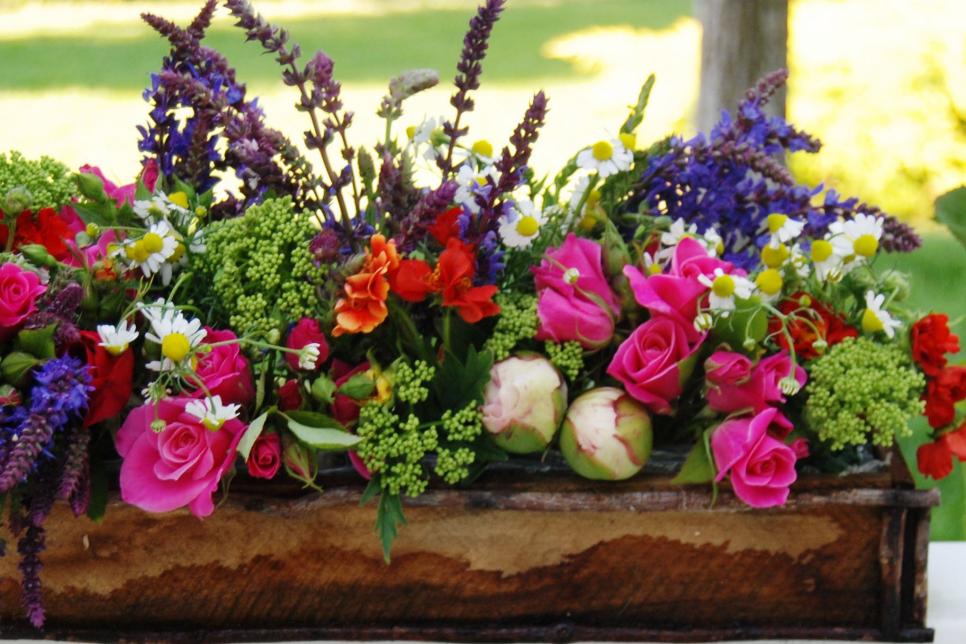
Colorful Abundance Combine loosestrife, peonies and roses with wildflowers at a low, rustic container to brighten up a windowsill. Picture courtesy of flickr consumer hello-julie.


Chalkboard Pots Give inexpensive terra cotta pots a playful makeover with chalkboard paint ; fill with blooming bulbs for a cheery pop of spring colour.


Monochromatic Magic A tiered collection of one hue is elastic and sophisticated. Here, yellowish fritillaria, tulips, freesias and daffodils tucked into a mixture of terra cotta pots and glass vases unite to make a stunning focal point for an Easter table or spring party.


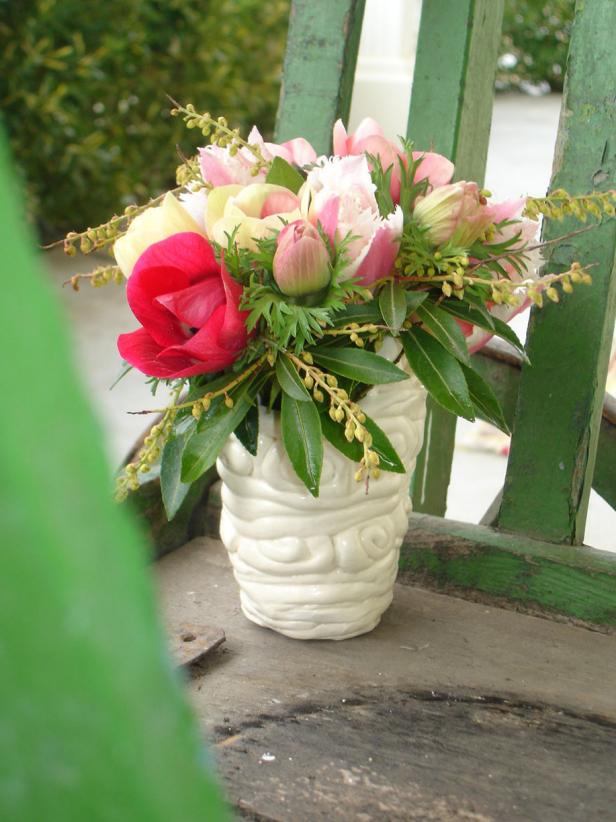
Pretty in Pink Anemones and tulips tucked into a handmade stoneware vase are perfect for a simple spring dinner party, indoors or out. Picture courtesy of flickr user hello-julie.


Small But Mighty Diminutive grape hyacinth, creamy double tulips and tiny fuchsia phlox pack a powerful punch when placed at a compact handmade urn. Image courtesy of flickr consumer hello-julie.


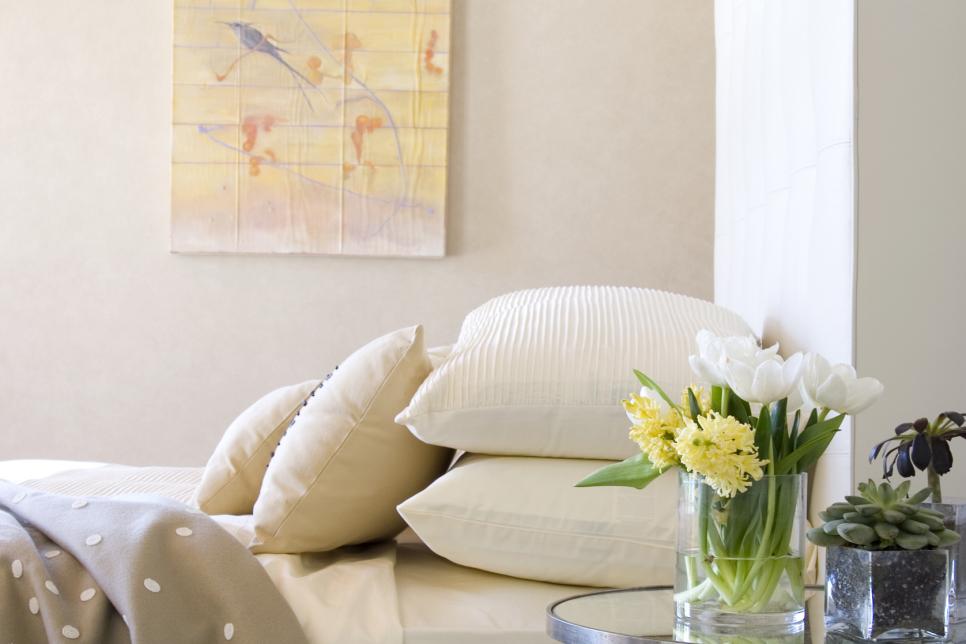
Restful Colors Wake up to some soothing bedside arrangement. Designer Lori Dennis used a glass vase full of hyacinth and white tulips to give this restful space a touch of spring.


Unarranged Arrangements Arranging flowers should not be intimidating or complicated. Simply choose three blossoms in complementary colors and shapes. Cut stems so blossoms sit two inches above the top of container, remove all leaves that will fall under the water line, and bunch flowers together in a tight, tight mounded arrangement. To maintain arrangements clean, cut on the ends and change the water every day or two. Typically, most arrangements continue about a couple weeks.


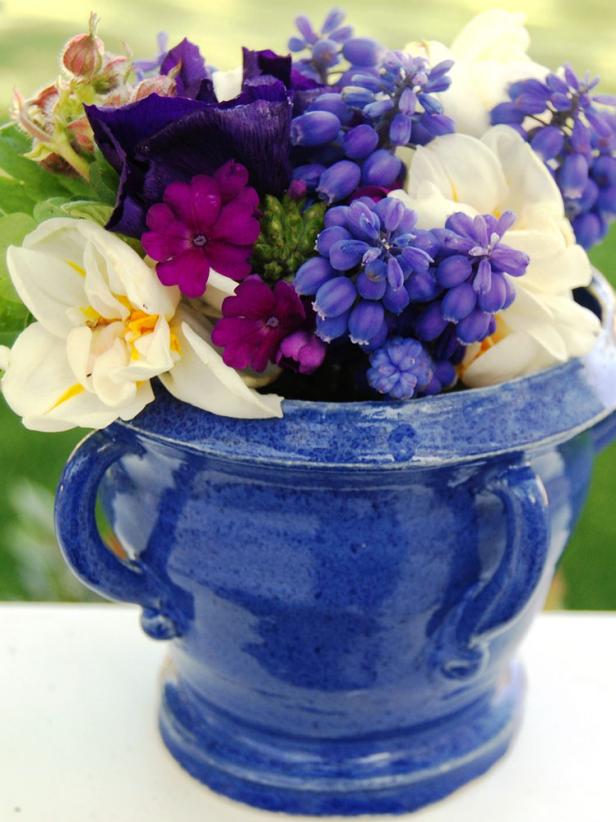
Celebrate Spring With a Vibrant Bouquet The contrasting whites and blues of this vibrant hand-tied bouquet create the blooms sing with strength. This arrangement produces a stunning Mother's Day gift or, in an orange or black glass vase, a sensational centerpiece.


A Visually Striking Springtime This arrangement of daffodils and dogwood stems brings a fresh, vibrant visual illusion to any kitchen table, windowsill as well as toilet. Employing a square glass vase makes this professional-looking screen simple to create.


Organic Appeal Young flag irises bloom under a canopy of horse chestnut leaves in a special arrangement that highlights nature's distinct scales and odd shapes. Position this screen on a shelf or mantelpiece at a light, airy space.


Bring Cherry Blossoms Indoors Japanese painting is the inspiration for this stunning yet simple celebration of spring: a casual, front-facing vase arrangement that resembles a shrub in bloom. This design suits a large, airy hall, living room, reception or porch.


Add a Little Zest Citrus halves add an unexpected bit of color to this vibrant, party-worthy arrangement. Insert the cut lemons, limes or oranges into your bouquet just before guests arrive so that they will appear fresh. Adorn the foundation of each vase with mounded citrus.


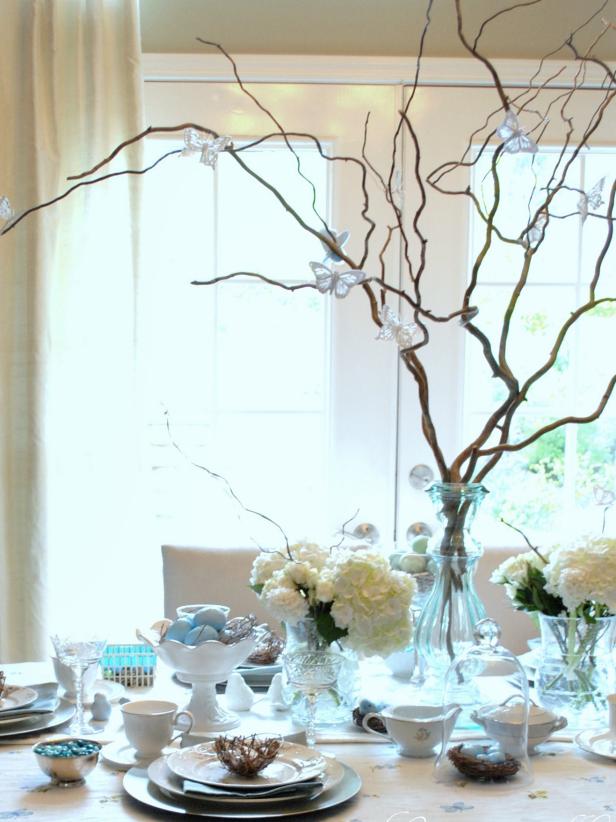
Spring Fling This whimsical centerpiece is ideal for spring-inspired dinner celebrations and is surprisingly easy to make. Towering curly willow branches in a tall vase juxtapose easy white hydrangeas in glass vessels. Design by Kate Riley of Centsational Girl


Bring the Garden In Stagger little and large antique bottles inside a classic wooden tool box and fill with your yard's most vibrant spring wildflowers.


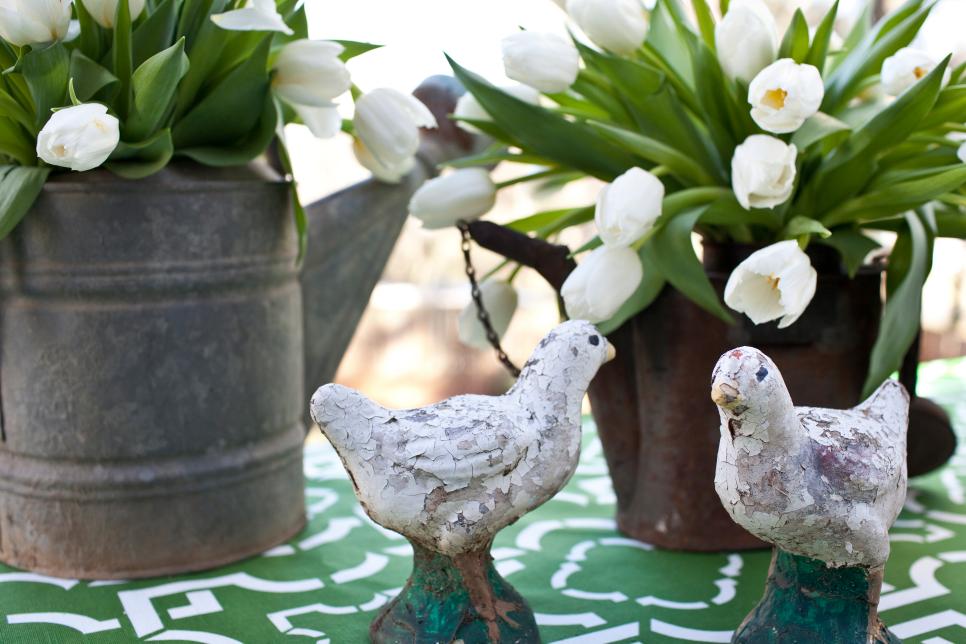
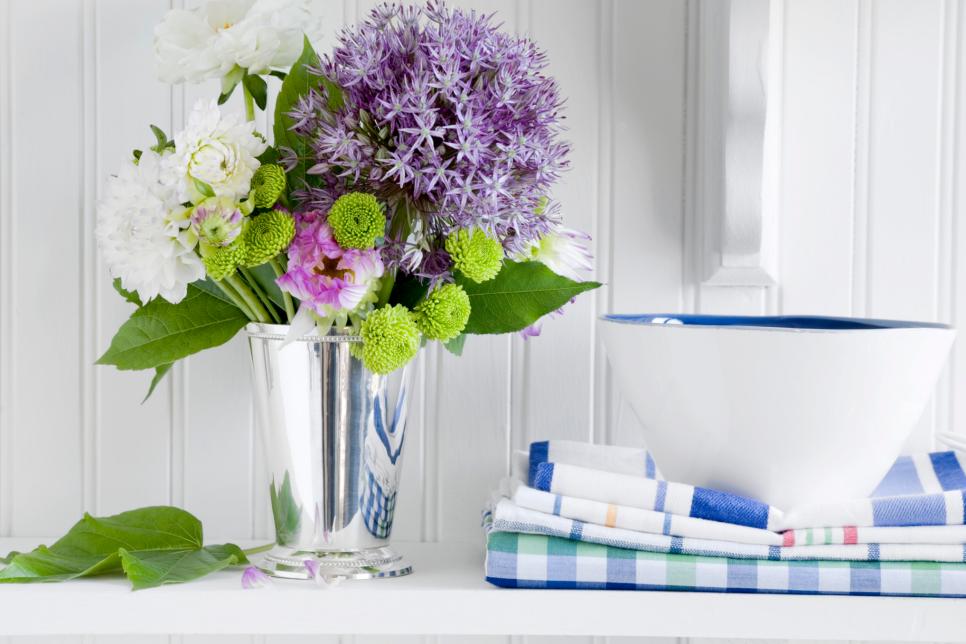
Fresh and clean Ideal for the kitchen or toilet, a silver vase full of pastel-colored blossoms can give a room a clean, fresh appearance.


Sweet Peas Keep it Simple This little vase arrangement of a couple of loose sweet peas shows that occasionally, less really is more. Its intimate scale, delicate look, subtle colors and mild fragrance supply an irresistable sensory pleasure.


Tea-Time Tulips Small arrangements may make a large impression. These loosely arranged tulips accent a vanity, china hutch or shelf perfectly, or dress up individual place settings or some children's tea party.


Traditional Beauty This remarkable rose-and-lilac arrangement appears to have an abundance of flowers but a lot of the material comes from carefully organized, pre-assembled foliage. This display will look fairly in a foyer, minimalist living room or banquet table for a dinner.


Pitcher Perfect This uncomplicated, freshly-picked arrangement captures the lush, natural abundance of the country. Lilacs are particularly beautiful tucked to a easy pitcher, however, use what you have on your garden.


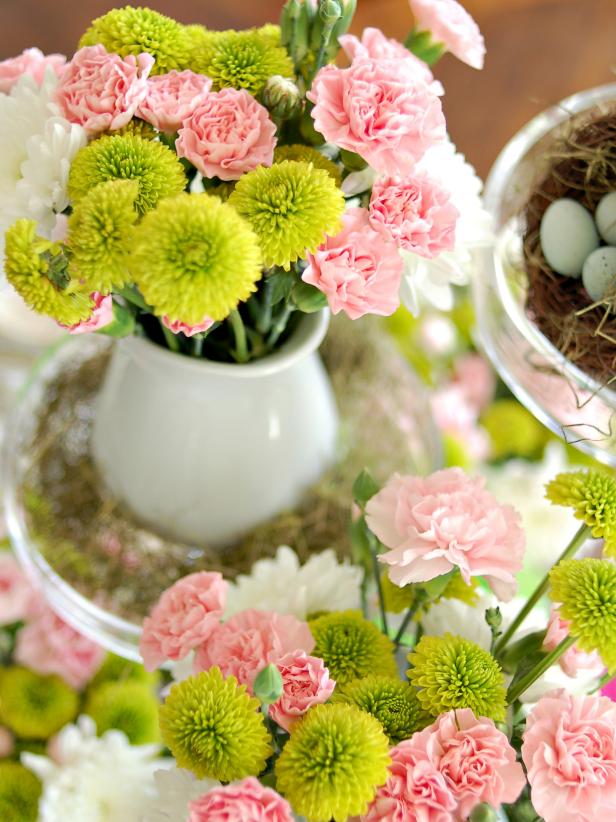
Spring Bursts Forth This colorful, energetic arrangement features a distinctive three-dimentional pop of tone-spanning pinks, with fresh green and natural wood complements. Create it for an Easter or Mother's Day gift or centerpiece.


Harbinger of Spring Grape hyacinths, in a handmade stoneware vase, then add a lush spring touch to any space. Picture courtesy of flickr consumer hello-julie.


Throw a Backyard Tailgate

Throw a Backyard Tailgate While HGTV Urban Oasis 2017 in Knoxville, Tennessee has the perfect backyard for entertaining, anyone can throw a winning match day gathering with just a little coaching. One of the most important elements to a fantastic celebration is to produce gathering zones for guests to eat, play and sofa with.


Score a Touchdown With Your Table Create a memorable table display by mixing old and new accessories. Start with a Turkish towel to your dining table cloth, then add vintage decorations to get a classic look, and incorporate footballs, helmets and pom-poms to display your team spirit.


SEC-Worthy Spread A playful signal showcases this Southern-themed menu with a huge orange twist to add spicy orange chicken wings, pulled chicken and slaw sliders, warm pimento cheese, white and orange vanilla cookies, and peanut butter brownies.


Fun and Festive Football field napkins, orange cups, and a custom football-inspired tin can for utensils incorporate a lively touch to this tailgate disperse. Pom-poms work double-duty, as guests can catch them to the match.


Sport Day Details Footballs are essential accessory to any tailgate dining table, also, it encourages guests to throw the ball around before the game. When in doubt, use vegetables and fruit as fillers. Oranges add a punch of color to this big orange gathering.


Spicy Orange Chicken Wings Not having wings in a soccer party is similar to not having a wedding cake in a wedding. It doesn't make sense. These hot orange chicken wings, courtesy of Knox Provisions, are hit with the audiences. Get the recipe.


Don't Forget the Kiddos Have an simple, grab-and-go bite for all those active kids. Watermelon and cantaloupe would be the ideal treats on a hot game day.


Must-Have Beverage Station No tailgate is complete without a stocked bar. Water, wine, carbonated beverages, beer, orange tea, and a assortment of spirits would be the perfect offerings for pre-gamming.


Game-Winning Cocktails Rather than big batch cocktails, create a family-friendly orange tea or a different fruity beverage and let age-appropriate guests pick which miniature version of bourbon or whiskey they wish to mix in. This adds an elevated level of personalization.


Mix and Mingle Invite a fantastic mix of individuals. In the hardcore sports fanatics who are still self-aware to the causal football fans who would just like to mingle, a fantastic set of varied interests are certain keep a lively party moving.


Our Neighborhood Mascot Even the puppy can get decked out for match days. Just for a fast photograph did our furry friend stone the orange shades and pom-poms. Good boy!


Soccer Fans Unite A good host always has an eye on the relaxation and pleasure of their guests. To keep the celebration going serve drinks, replenish the food table, and be certain there's a fantastic playlist set for halftimes and business breaks. Delegate tasks to people accountable party-goers who constantly ask "what could I do to help?" .


Plush Accessories Tartan plaid blankets and also plush outdoor pillows create an inviting sitting room around the fire pit. An eight six (Knoxville's place code) canvas bag is trimmed and sewn into an outdoor pillow, a crafty and clever nod to the area.


Everybody is Game Day Ready Knox, our dapper Labrador retriever, is prepared for the game with his handsome bowtie. To be courteous of guests with pets, then lay out a couple bowls of water along with a basket of tennis balls. The thoughtful gesture will not go undetected.


Lively Yard Games For people who don't want to get glued to ESPN College GameDay on TV, have a few other competitive options. KanJam (displayed in the film), cornhole, and also frisknock are party favorites. Play in teams or perform solo, but don't forget "winner" gets second match.


Setup a Photo Booth From tailgates to birthday celebrations and other special events, a DIY photo booth is always a good idea. A painted bit of turf resembling a soccer field lined with pom-poms make a fantastic backdrop. Add a basket of props and you are ready to take a memorable montage with friends.


Show Your Team Spirit A fundamental digital point-and-shoot camera, a tripod that's tall enough to extend to eye level and a remote shutter release for the camera are some basics to create your DIY picture booth untrue. A remote shutter release allows guests to take their own photograph, permitting you to enjoy the party rather than enjoying photographer daily.


Playful Props Football helmets, a glowing orange feather boa, lively sunglasses, and #1 foam hands are among the enjoyable and amusing photo props for visitors to enjoy.


Have a Great Picture With Your Phone "Selfies are fun, but there is nothing like a great photo booth portrait," says Mallory Ziglar, HGTV Community Manager. "To get your next best profile photograph, ensure your entire body is in the shot - do not cut off any toes! Use the rule of thirds to frame your subject in the upper or lower third of this shooter. Using grid style makes this foolproof. Snap multiple shots to be certain you receive at least one which isn't blurry."


Shipping to the Game A good pair of flying bikes are great to have on hand. HGTV Urban Oasis 2017 is a Brief bike ride from the University of Tennessee and Neyland Stadium. Want to see more? Tour your house and enter for your chance to win.


Build a Backyard Pergola

Build a Backyard Pergola Pergolas offer refuge from sunlight and are an attractive permanent addition to any backyard area. Installing one does not need to break your budget, either. Grab a of couple useful friends and make this simple timber pergola, which can be made in just a couple of days' work.


You Will Need 4 ground-rated articles of 4-inch x 4-inch x 10-foot pressure-treated southern yellow pine or cedar / 11 boards of 2-inch x 6-inch x 10-foot pressure-treated southern yellow pine or cedar / 5 boards of 1-inch x 4-inch x 10-foot pressure-treated southern yellow pine or cedar / 2 2-inch x 4-inch x 10-foot pressure-treated southern yellow pine or cedar / 1 2-inch x 2-inch x 10-foot pressure-treated southern yellow pine or cedar / eight 10-inch-long, 1/2-inch galvanized carriage bolts with washers and nuts / eight 50-pound bags post-setting concrete mix / one box 2 1/2-inch deck screws / measuring tape / post-hole digger/ 8 wooden stakes / / miter saw / drill with Phillips head attachment / 2 scrap pieces of 2-inch x 4-inch x 2-foot timber / hammer / wood knobs


Mark Post Locations Pick a place that is somewhat flat with decent drainage. Mark first corner with a stake. Measure 96 inches and then mark with another stake to signify 1 side of the pergola. Using measuring tape, locate the place in which a measurement of 136 inches diagonally intersects in the initial stake and 96 inches from the second (implementing the Pythagorean theorem) and mark with a third stake. Repeat the process, measuring a space of 96 inches out of stake three and 136 inches from stake two to mark the previous corner. Confirm the distance between all adjacent corners is 96 inches and also opposing corners measure 136 inches. Correct as needed.


Dig Post Holes Employing a post-hole digger, dig a pit at each marker to a depth of 2 feet and no less than 10 inches in diameter, making certain the interior corner of an inserted pole will rest at the marked point. A larger hole allows for adjustments when placing posts and a more solid base for your pergola once concrete is poured.


Insert and Stabilize Posts Put post in hole, making sure it rests firmly on the bottom. Using a level, make sure post sits square and absolutely flat. Nail or screw an angled stake to adjoining sides of post to hold in place. Repeat process on staying thee posts.


Pour Concrete Concrete can be mixed directly in pole holes. Pour concrete mixture around the post to the first hole to 1/3 full and add water using a hose or bucket. Stir to fully combine, add a second layer of concrete and replicate. Finish filling the hole with concrete and water. Confirm post has remained flat and adapt as needed. Repeat process on the remaining three posts.


Confirm All Articles are Level and Square Check all measurements and make certain all articles are flat and facing each other evenly before concrete sets. A series stretched around all four articles can be used to confirm corners are square (chain should rest flat on sides of articles. Correct as needed. Depending on what type of concrete is used, wait a few hours or overnight before continuing construction. Confirm concrete packing for time needed to fully place.


Cut Joist/Girder Girders are the cross bits on , which joists rest and are cut to joists. Measure two inches back on the conclusion of a 2-inch x 6-inch x 10-foot plank and mark with a pencil. Leaving the measured 2 inches undamaged, cut plank from markers at a 45-degree angle utilizing miter saw. Repeat at the other end of board, making sure to mark from the exact same long edge.


Cut Remaining Joists/Girders Cut remaining 10 joists/girders in precisely the same manner. These are the principal elements of this pergola roof and provide stability.


Attach Temporary Girder Braces Beginning from the top of this first article, measure down 5 1/2 inches and mark with pencil. Screw a piece of scrap 2-inch x 4-inch x 2-foot lumber to the pole with high edge at marked height and parallel to the direction joists must be run. Repeat procedure on staying posts with braces facing the exact same direction leveled at the exact same height.


Place and Level Girders Put a girder on each side of paired articles for a total of four service girders. The best of girders will probably be even with the top of the post. Place a level on each girder and fix as needed. Lay a joist crosswise on top to length girders and affirm it is also level front-to-back. In circumstances where the ground is sloped, these alterations might be up to several inches, leaving the top of a post vulnerable. After girders have been leveled, cut pole flush with the top of girders, if necessary.


Secure Girders Utilize wood clamps to maintain girders in place. On the first place, measure 1 inch in the bottom and top of every girder, centre on post and mark with a pencil. Using a drill drill a hole at each of the two conspicuous stains stretching through pole and both girders. In the exterior, hammer 10-inch carriage bolts and secure with washers and bolts. Repeat remaining three posts. Once all of eight carriage bolts are secure, remove straps and encourage braces.


Place Joists Find the midpoint of every pair of girders and set center joist to length with an overhang of 5 1/2 inches at each end. Measuring 17 inches from center joist in every direction, place two more joists. Measuring outward 17 inches from additional joists, continue to include joists until all are in place and evenly spaced throughout the pergola.


Safe Joists Using deck screws and a drill with Phillips head attachment, attach all joists to girders by driving screws through joists into every girder from both sides at a 45-degree angle (for a total of eight screws per joist).


Place and Secure Roof Slats Locate the midpoint of joists (measuring along outer joists on both sides) and put a 1-inch x 4-inch x 10-foot board to length with an overhang of 8 inches at each end. Secure with deck screws. Measuring 22 inches out of affixed center roof slat in each direction, place and secure two more slats. Quantify out 22 inches out of additional planks secure and to place closing two roof slats.


Cut Horizontal Ladder Trim Cut two 2-inch x 4-inch x 10-foot planks into a length of 9 feet.


Attach and Secure Horizontal Ladder Reduce Step down 6 inches from the bottom of the girders and use wood clamps to attach a cut 2-inch x 4-inch plank parallel using girders together with the top edge at the 6-inch mark. Level protected using deck screws and plank. Repeat on opposite side of the pergola. Remove clamps once attached.


Cut and Attach Rungs Mitered at 45 degrees, cut eight 15-inch bits from a 2-inch x 2-inch x 10-foot plank. Locate midpoints between joists that are adjacent and centre joist and attach rungs to the inside of girder and trimming with deck screws. Squeeze external 17 inches from the recently attached rungs, secure two rungs on to every side. Repeat on the opposite side of the pergola.


Create a Border A pergola will add an elegant touch to outside places and may be built over patios or in natural environment. To present our pastoral pergola a finished appearance, we made a very simple boundary with four 2-inch x 4-inch x 10-foot planks attached at the corners with utility screws. To fill in the "floor," we used 1 square yard of57 washed gravel raked level at a 4-inch thickness.


Completed Pergola Construction is complete. Any visible marks or spurs could be hand coated, if needed. Treated timber requires no sealant, but stain or paint may be implemented, if needed. Plants and Plants or mulch might be used to accessorize. This cheap and easy-to-build pergola provides years of maintenance-free enjoyment.


Light It Up Stringing lights along the roof of your pergola will allow you to enjoy the space.