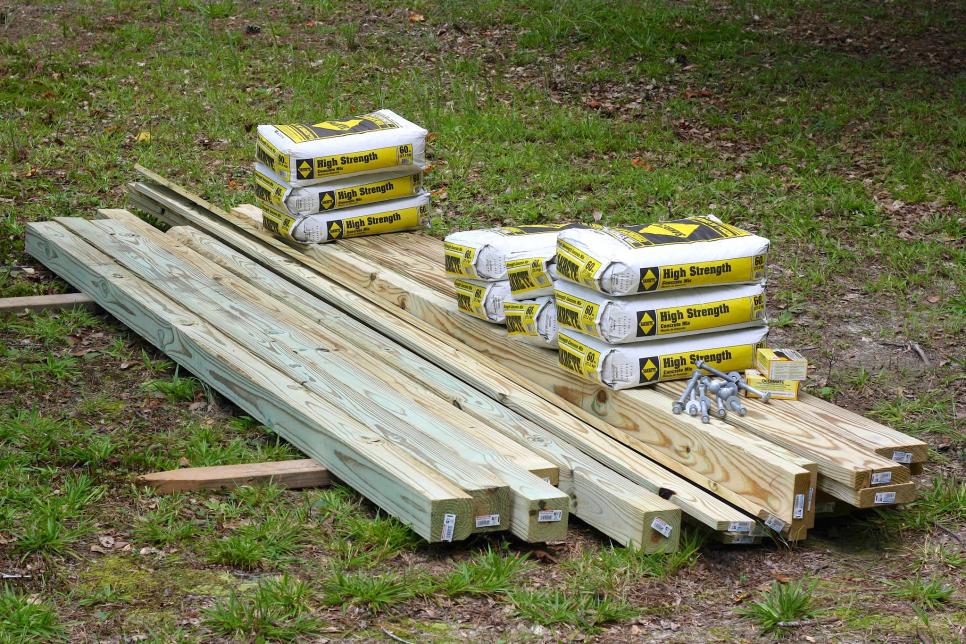
You Will Need 4 ground-rated articles of 4-inch x 4-inch x 10-foot pressure-treated southern yellow pine or cedar / 11 boards of 2-inch x 6-inch x 10-foot pressure-treated southern yellow pine or cedar / 5 boards of 1-inch x 4-inch x 10-foot pressure-treated southern yellow pine or cedar / 2 2-inch x 4-inch x 10-foot pressure-treated southern yellow pine or cedar / 1 2-inch x 2-inch x 10-foot pressure-treated southern yellow pine or cedar / eight 10-inch-long, 1/2-inch galvanized carriage bolts with washers and nuts / eight 50-pound bags post-setting concrete mix / one box 2 1/2-inch deck screws / measuring tape / post-hole digger/ 8 wooden stakes / / miter saw / drill with Phillips head attachment / 2 scrap pieces of 2-inch x 4-inch x 2-foot timber / hammer / wood knobs
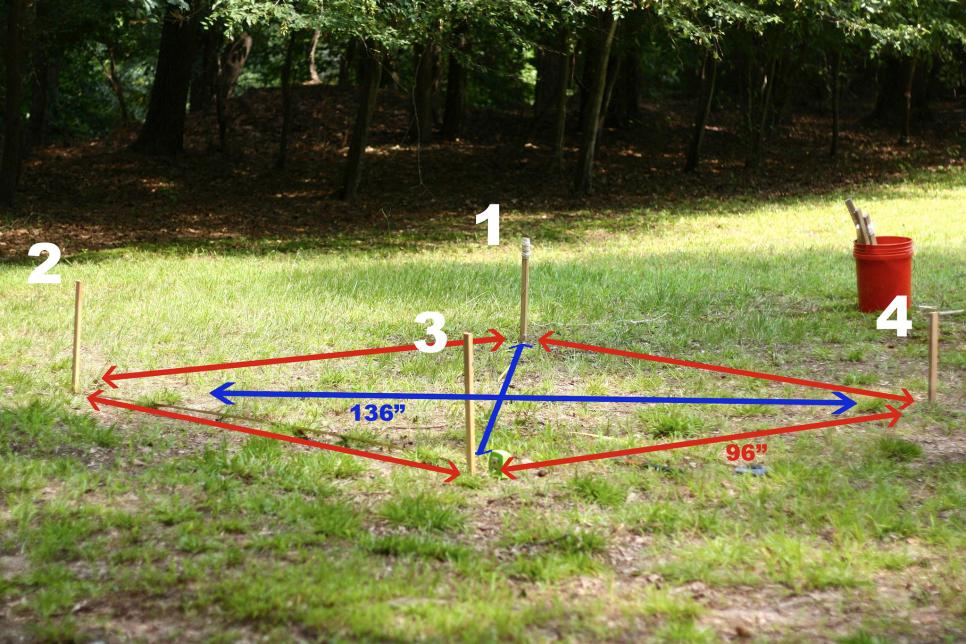
Mark Post Locations Pick a place that is somewhat flat with decent drainage. Mark first corner with a stake. Measure 96 inches and then mark with another stake to signify 1 side of the pergola. Using measuring tape, locate the place in which a measurement of 136 inches diagonally intersects in the initial stake and 96 inches from the second (implementing the Pythagorean theorem) and mark with a third stake. Repeat the process, measuring a space of 96 inches out of stake three and 136 inches from stake two to mark the previous corner. Confirm the distance between all adjacent corners is 96 inches and also opposing corners measure 136 inches. Correct as needed.
Dig Post Holes Employing a post-hole digger, dig a pit at each marker to a depth of 2 feet and no less than 10 inches in diameter, making certain the interior corner of an inserted pole will rest at the marked point. A larger hole allows for adjustments when placing posts and a more solid base for your pergola once concrete is poured.

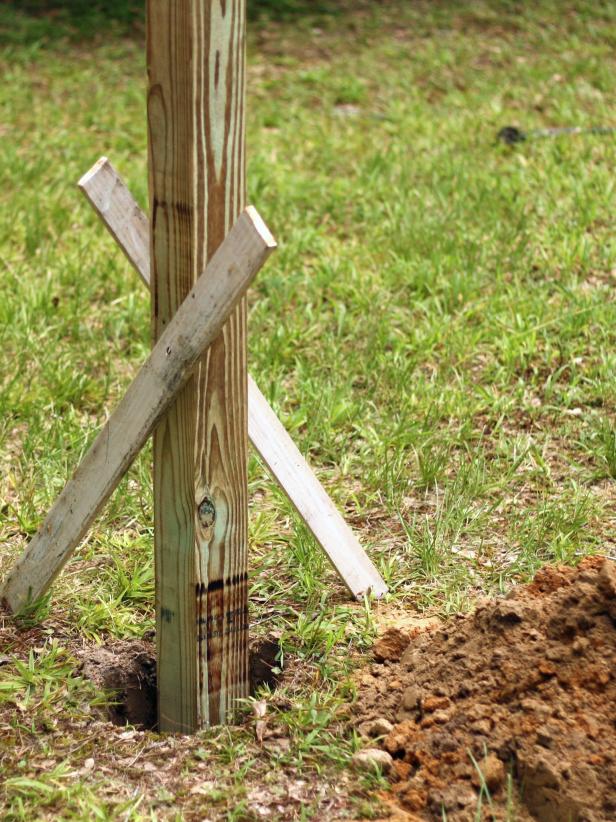
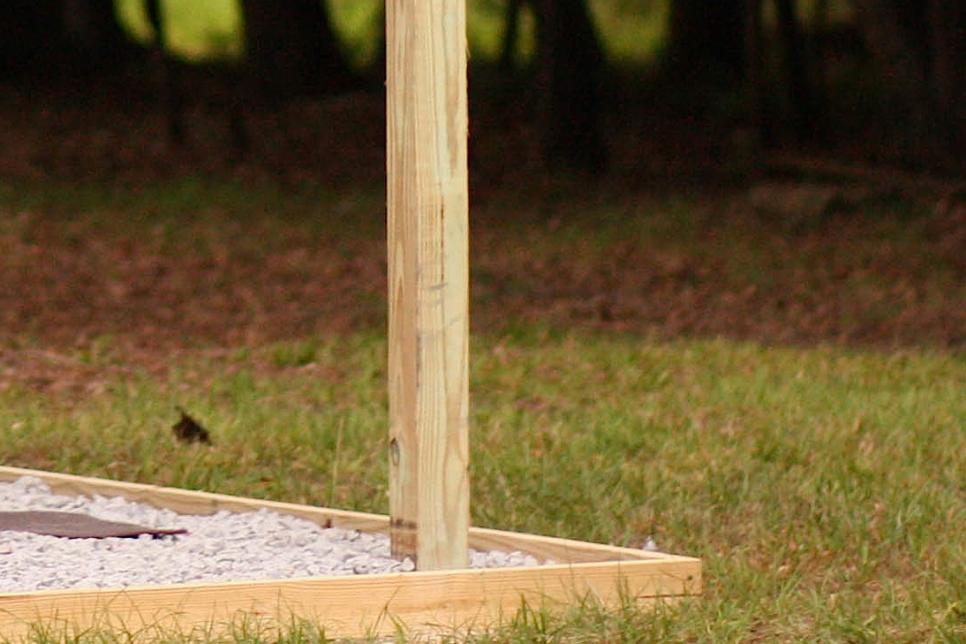
Insert and Stabilize Posts Put post in hole, making sure it rests firmly on the bottom. Using a level, make sure post sits square and absolutely flat. Nail or screw an angled stake to adjoining sides of post to hold in place. Repeat process on staying thee posts.
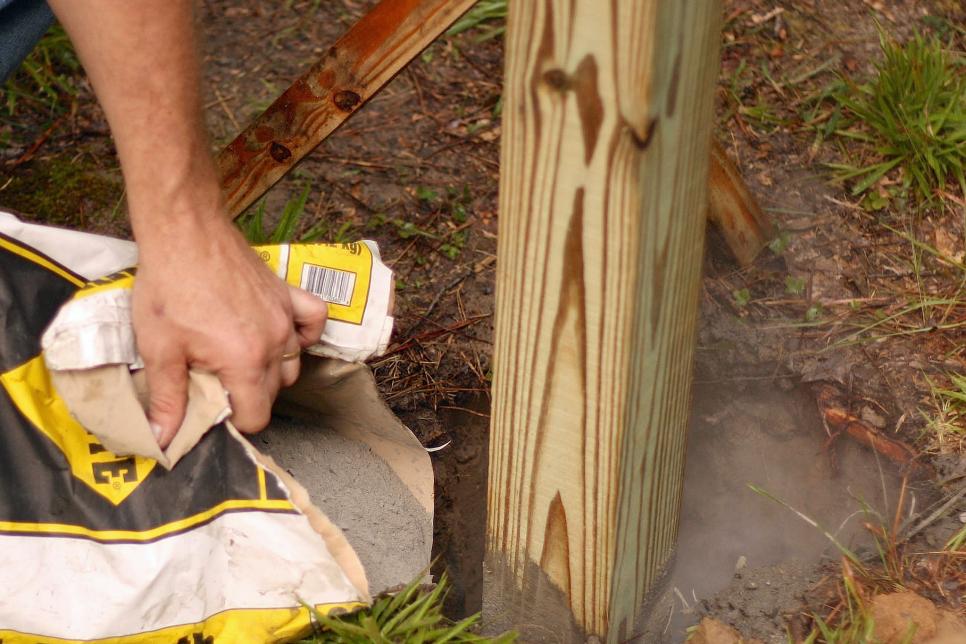
Pour Concrete Concrete can be mixed directly in pole holes. Pour concrete mixture around the post to the first hole to 1/3 full and add water using a hose or bucket. Stir to fully combine, add a second layer of concrete and replicate. Finish filling the hole with concrete and water. Confirm post has remained flat and adapt as needed. Repeat process on the remaining three posts.
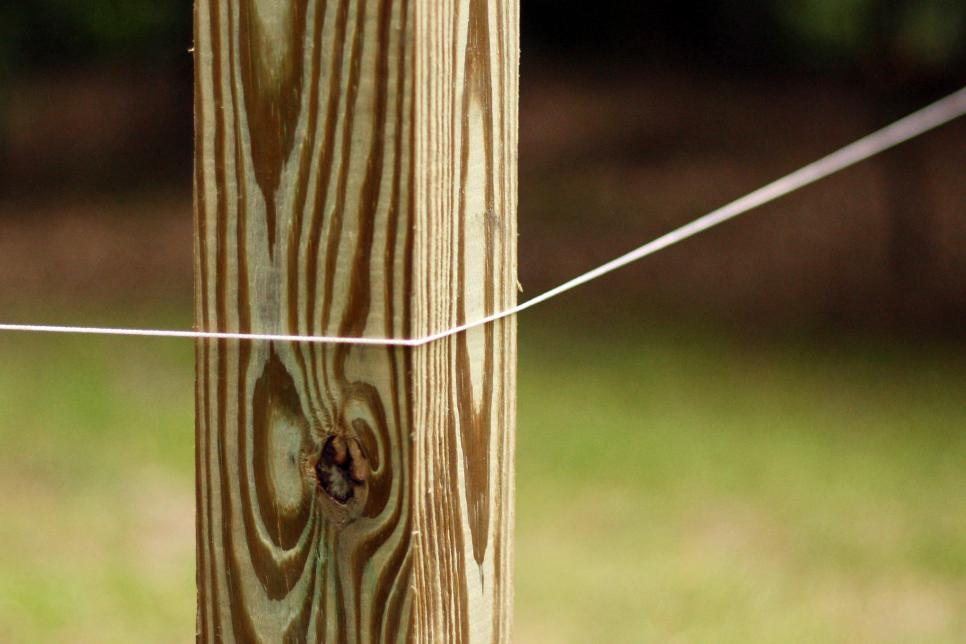
Confirm All Articles are Level and Square Check all measurements and make certain all articles are flat and facing each other evenly before concrete sets. A series stretched around all four articles can be used to confirm corners are square (chain should rest flat on sides of articles. Correct as needed. Depending on what type of concrete is used, wait a few hours or overnight before continuing construction. Confirm concrete packing for time needed to fully place.
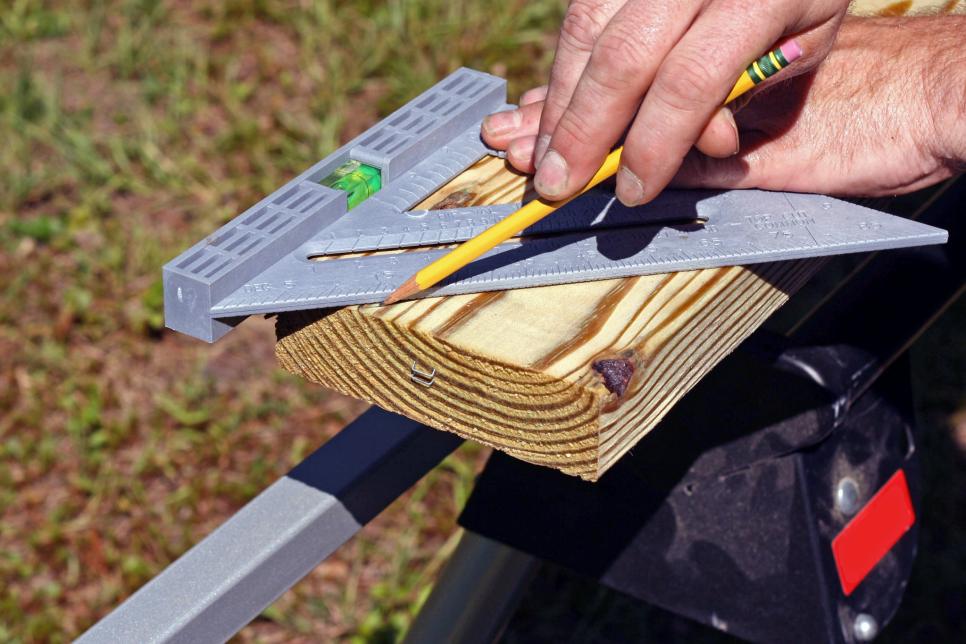
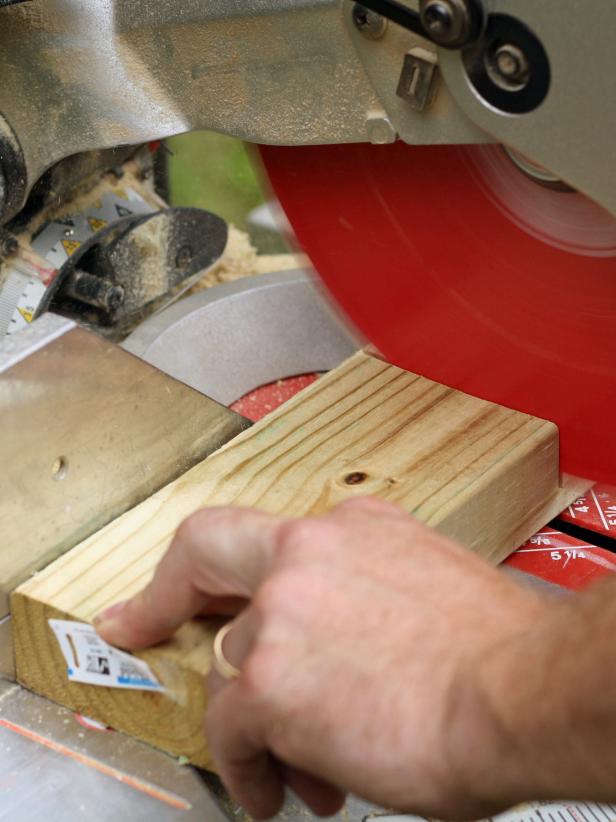
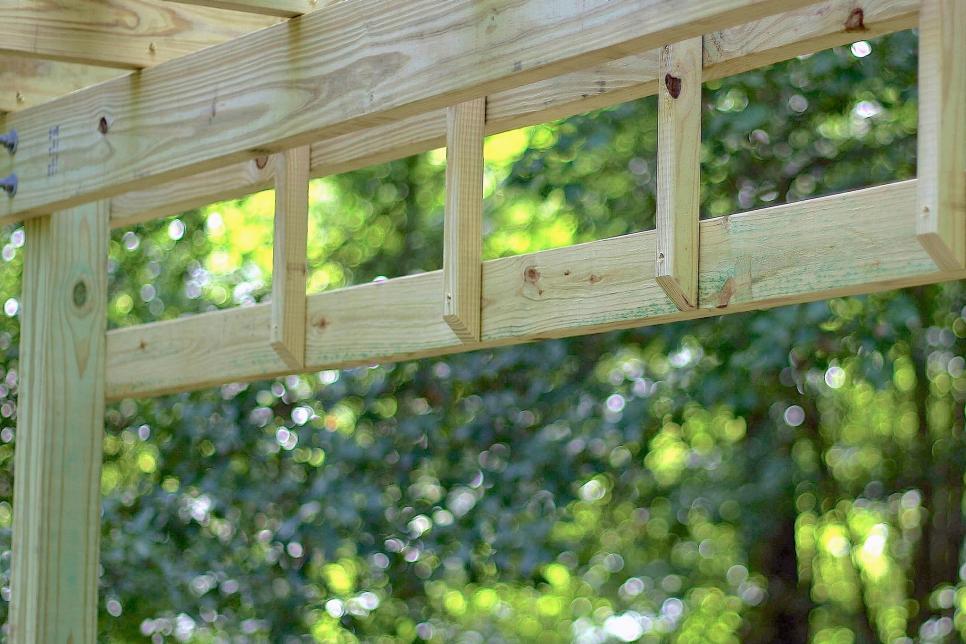
Cut Joist/Girder Girders are the cross bits on , which joists rest and are cut to joists. Measure two inches back on the conclusion of a 2-inch x 6-inch x 10-foot plank and mark with a pencil. Leaving the measured 2 inches undamaged, cut plank from markers at a 45-degree angle utilizing miter saw. Repeat at the other end of board, making sure to mark from the exact same long edge.
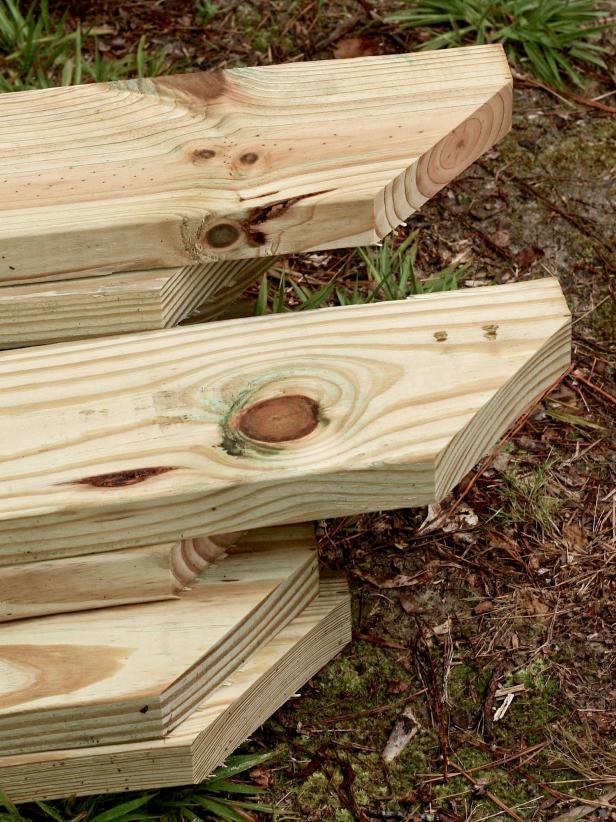
Cut Remaining Joists/Girders Cut remaining 10 joists/girders in precisely the same manner. These are the principal elements of this pergola roof and provide stability.
Attach Temporary Girder Braces Beginning from the top of this first article, measure down 5 1/2 inches and mark with pencil. Screw a piece of scrap 2-inch x 4-inch x 2-foot lumber to the pole with high edge at marked height and parallel to the direction joists must be run. Repeat procedure on staying posts with braces facing the exact same direction leveled at the exact same height.
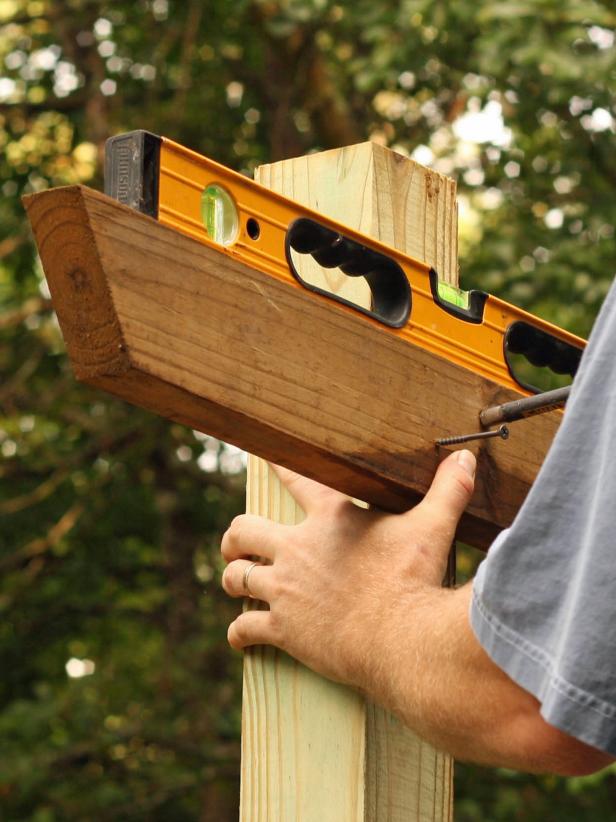
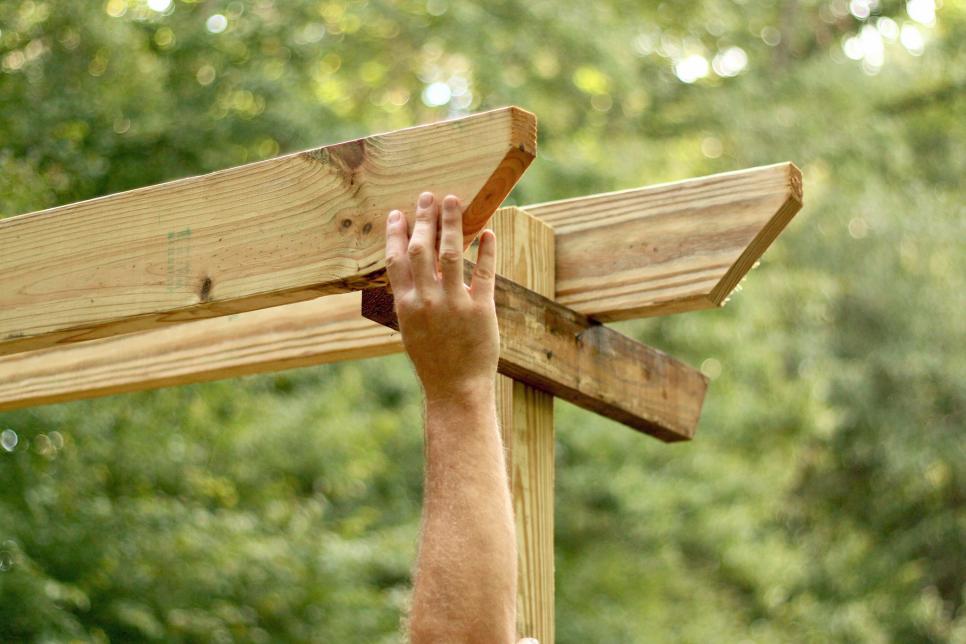
Place and Level Girders Put a girder on each side of paired articles for a total of four service girders. The best of girders will probably be even with the top of the post. Place a level on each girder and fix as needed. Lay a joist crosswise on top to length girders and affirm it is also level front-to-back. In circumstances where the ground is sloped, these alterations might be up to several inches, leaving the top of a post vulnerable. After girders have been leveled, cut pole flush with the top of girders, if necessary.
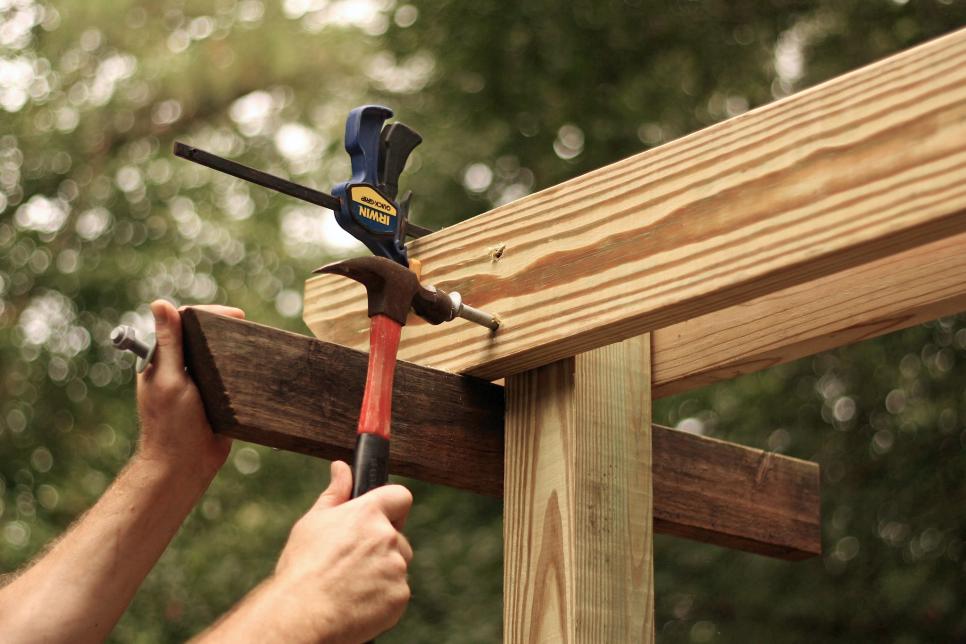
Secure Girders Utilize wood clamps to maintain girders in place. On the first place, measure 1 inch in the bottom and top of every girder, centre on post and mark with a pencil. Using a drill drill a hole at each of the two conspicuous stains stretching through pole and both girders. In the exterior, hammer 10-inch carriage bolts and secure with washers and bolts. Repeat remaining three posts. Once all of eight carriage bolts are secure, remove straps and encourage braces.
Place Joists Find the midpoint of every pair of girders and set center joist to length with an overhang of 5 1/2 inches at each end. Measuring 17 inches from center joist in every direction, place two more joists. Measuring outward 17 inches from additional joists, continue to include joists until all are in place and evenly spaced throughout the pergola.

Safe Joists Using deck screws and a drill with Phillips head attachment, attach all joists to girders by driving screws through joists into every girder from both sides at a 45-degree angle (for a total of eight screws per joist).

Place and Secure Roof Slats Locate the midpoint of joists (measuring along outer joists on both sides) and put a 1-inch x 4-inch x 10-foot board to length with an overhang of 8 inches at each end. Secure with deck screws. Measuring 22 inches out of affixed center roof slat in each direction, place and secure two more slats. Quantify out 22 inches out of additional planks secure and to place closing two roof slats.

Cut Horizontal Ladder Trim Cut two 2-inch x 4-inch x 10-foot planks into a length of 9 feet.
Attach and Secure Horizontal Ladder Reduce Step down 6 inches from the bottom of the girders and use wood clamps to attach a cut 2-inch x 4-inch plank parallel using girders together with the top edge at the 6-inch mark. Level protected using deck screws and plank. Repeat on opposite side of the pergola. Remove clamps once attached.

Cut and Attach Rungs Mitered at 45 degrees, cut eight 15-inch bits from a 2-inch x 2-inch x 10-foot plank. Locate midpoints between joists that are adjacent and centre joist and attach rungs to the inside of girder and trimming with deck screws. Squeeze external 17 inches from the recently attached rungs, secure two rungs on to every side. Repeat on the opposite side of the pergola.
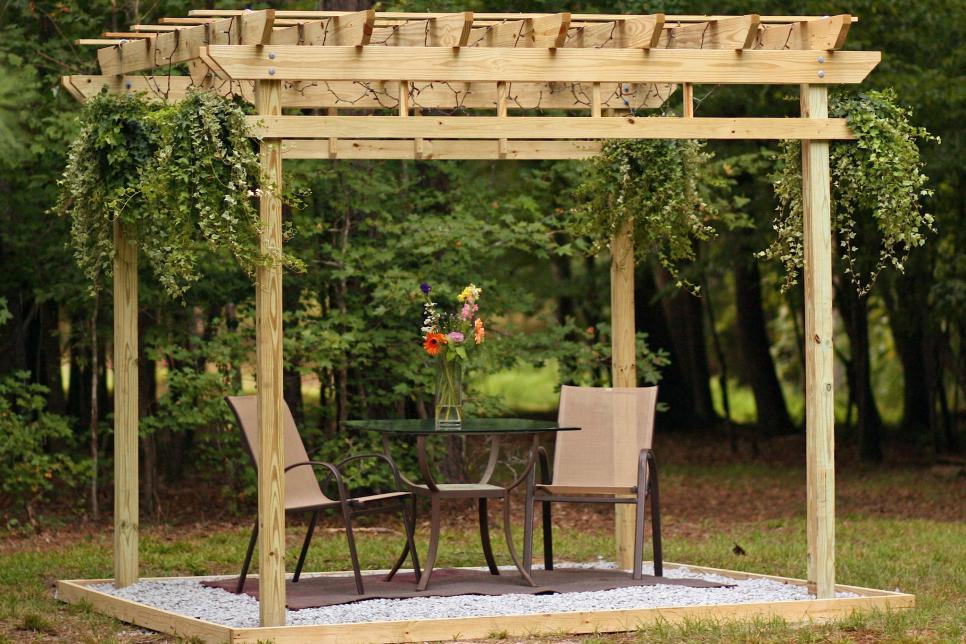
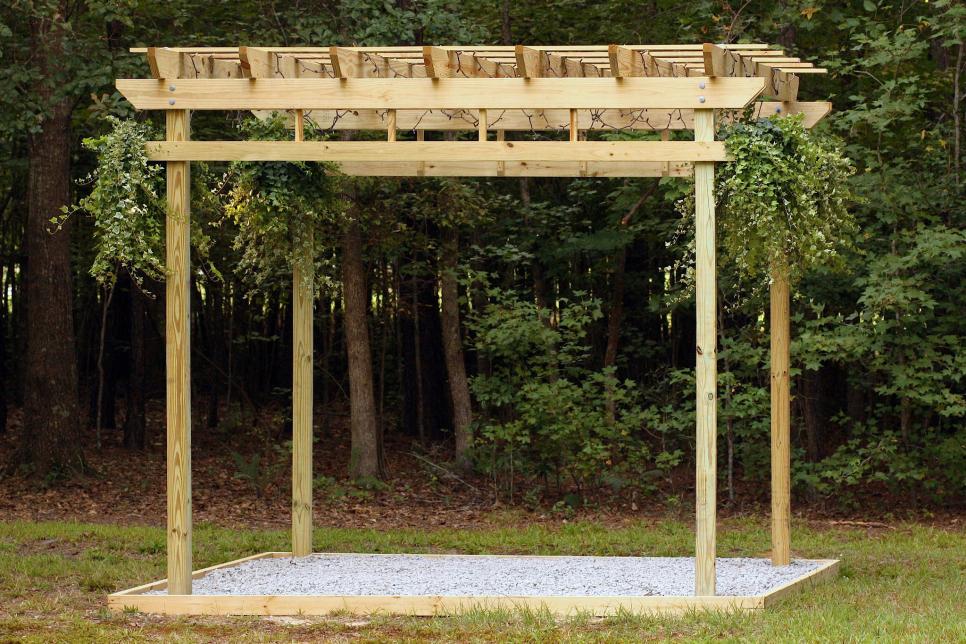
Create a Border A pergola will add an elegant touch to outside places and may be built over patios or in natural environment. To present our pastoral pergola a finished appearance, we made a very simple boundary with four 2-inch x 4-inch x 10-foot planks attached at the corners with utility screws. To fill in the "floor," we used 1 square yard of57 washed gravel raked level at a 4-inch thickness.
Completed Pergola Construction is complete. Any visible marks or spurs could be hand coated, if needed. Treated timber requires no sealant, but stain or paint may be implemented, if needed. Plants and Plants or mulch might be used to accessorize. This cheap and easy-to-build pergola provides years of maintenance-free enjoyment.
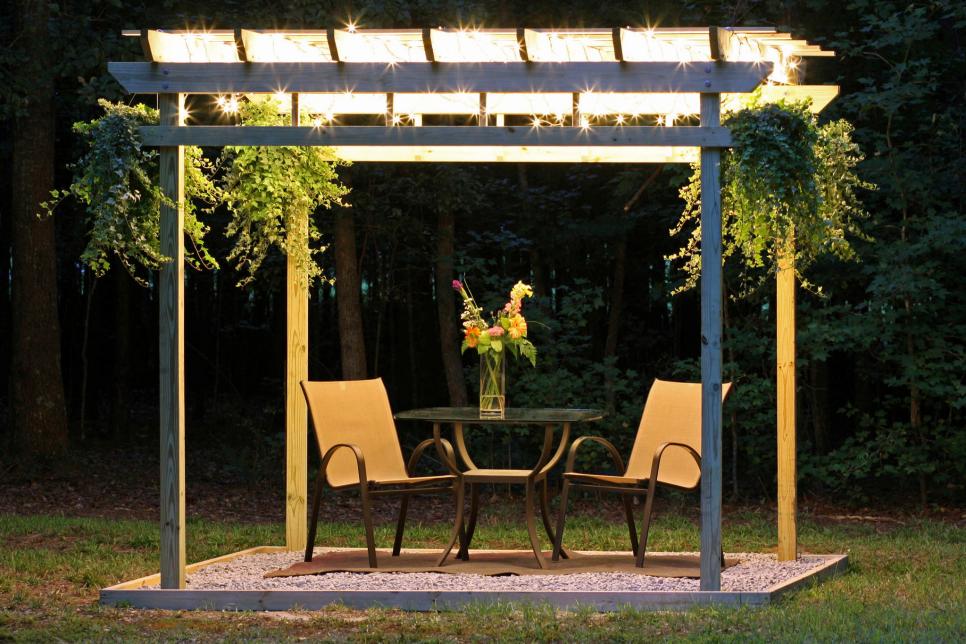
Light It Up Stringing lights along the roof of your pergola will allow you to enjoy the space.
No comments:
Post a Comment